Creating your own Groups of email addresses is a handy function, as it allows you to send email to a pre-defined collection of people easily, without having to remember their names or email addresses. Whether you are on a server at work, trying to define a group of people to receive regular reports, or you want to set up a group at home to forward all your jokes to, this can save you a ton of time in the long run.
Part 1 – Creating your own Groups
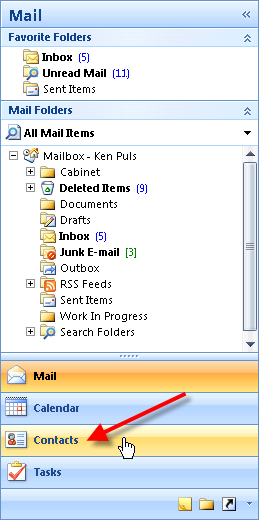
If you are in the email view, click the Contacts button in the left navigation bar on your screen:
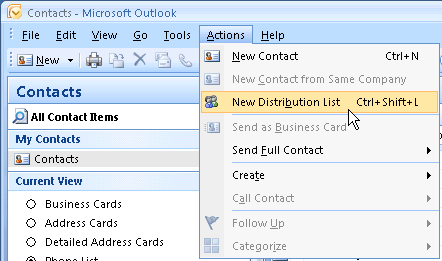
Now, you should be in the Contacts view. Choose Actions then New Distribution List (or press Ctrl+Shift+L)
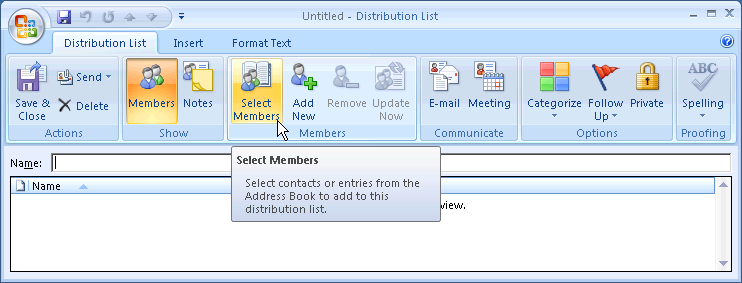
Next, you’ll want to choose Select Members from the Members group on the Ribbon.
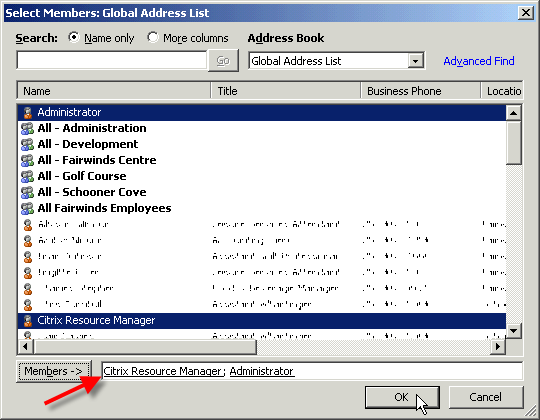
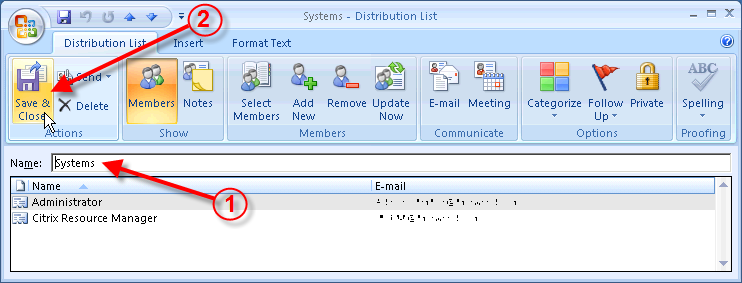
I’ve doubled clicked both Administrator and Citrix Resource Manager accounts, at which point they show in the “Members ->” area at the bottom of the screen. (Pick someone you actually want to email.) Once you’ve got a nice list of people that you’d like to include in your group, click OK.
Next, give your group a name that makes sense, and the click the Save & Close button on the Actions group.
Part 2 – Emailing Your Group
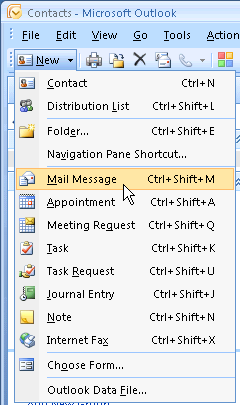
Okay, now the useful part… let’s send our group an email. From the New menu, choose Mail Message (or just press Ctrl+Shift+M to create a new mail message.)
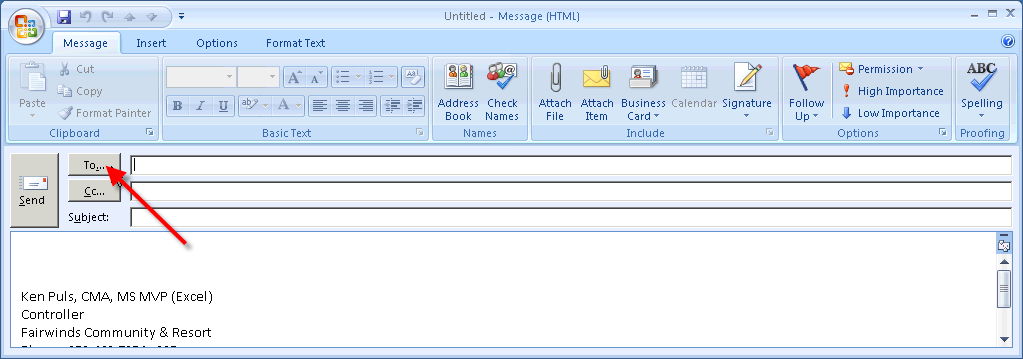
In the email message, click the To… button:
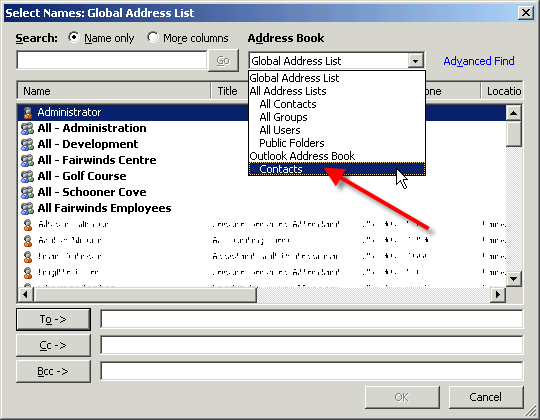
The secret to finding your new group is to click the drop down arrow and choose the address book that holds the group you created. (In this case Outlook Contacts instead of our Global Address List):
And there it is! Double click it to select it, then click OK.

You’ll notice that your email is now addressed to the group. Now… do you remember who you put in the group? Okay, you probably do at this stage, but as time goes on, you may forget and want to verify it. (Or maybe it is your joke list, and you want to forward it to everyone except the person who just emailed the joke to you.) Do you see the little + sign just in front of the group name?
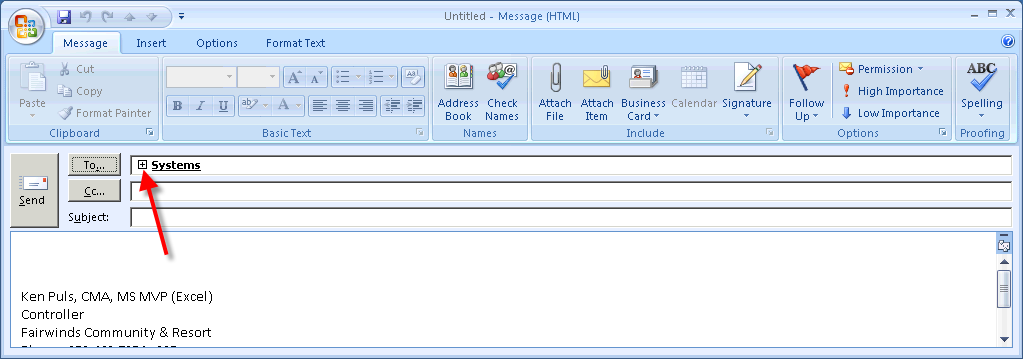
Go ahead and give it a click…
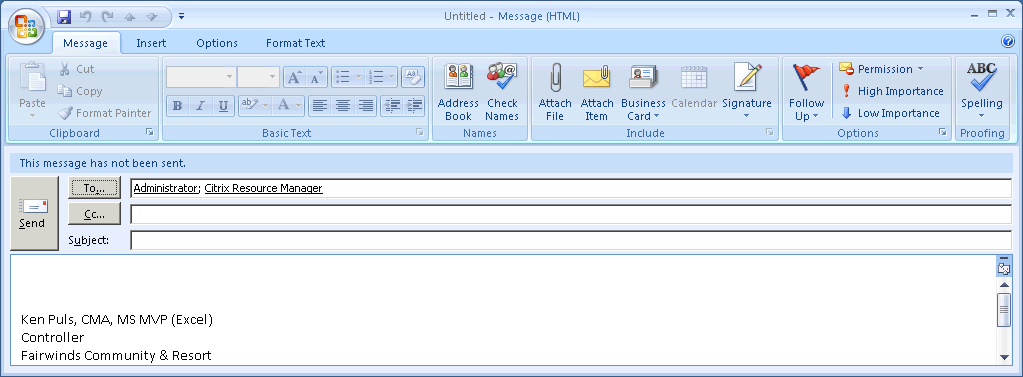
The email group automatically expands to show you the names of all of the members! You’ll never wonder who you’re sending email to again! And if you want to remove one, just highlight the name and press the delete key. It's just that easy!
Part 3 - Editing existing groups
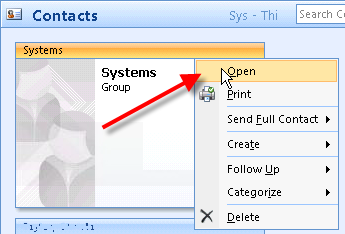
Assume now that months have gone by, and you want to make a change to your group… either adding or removing someone. How do you do it? The first step is to located the group in your contacts list. Once you’ve found it, right click it, and choose Open.
Your "Distribution List" will open, and show who the members are.
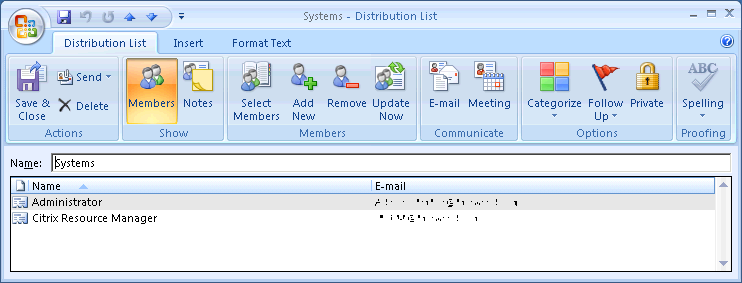
At this point, here are just some of the options you have:
Add Members:
- Click the Select Members button
- Select them from the address book(s)
- Click OK
- Click Save & Close
- Click on the users name
- Click the Remove button on the [/b]Members[/b] group
- Click Save & Close
- Change the Name field
- Click Save & Close
- Click the Delete button in the Actions group


